
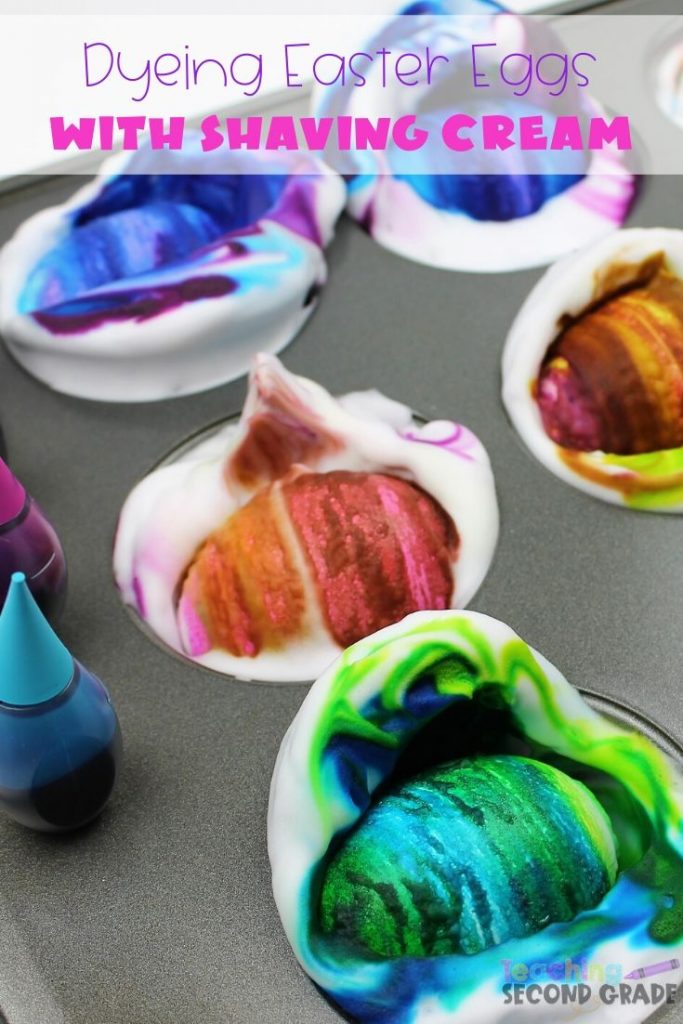
Easter is approaching and there are so many traditions involved. One tradition is dying easter eggs. Pinterest has thousands of ideas for dying easter eggs, however, I love this one. Dying Easter eggs with Shaving Cream is simple and friendly for kids of all ages.
Can you eat eggs that are dyed with shaving cream?
While dying eggs with shaving cream make them very beautiful they are not safe to eat. These are strictly for decoration and hiding.
Does the length of time in the shaving cream matter?
The longer the eggs sit in the shaving cream the longer they have to really soak in the color. Depending on how bright you want your eggs will depend on how long you let them sit.
How to Dye Easter Eggs with Shaving Cream
Related: Pom Pom Butterflies Spring Craft
Supplies:
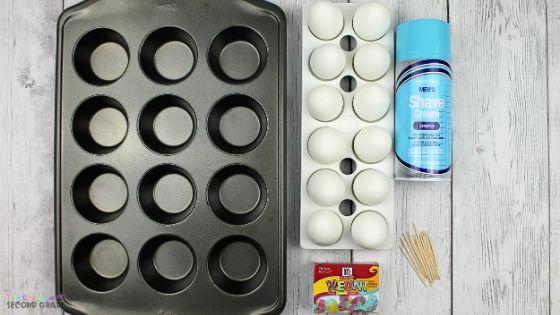
12 boiled eggs
large muffin pan
neon or primary food coloring (for this project I used neon)
plastic spoon (not pictured)
paper towels for easy cleanup (not pictured)
Pan or container lined with a paper towel
Optional: plastic gloves (not pictured)
Related: Weaving Easter Basket Craft
Directions:
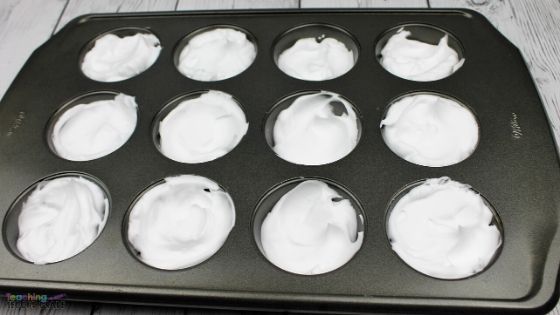
Squirt a thin layer of shaving cream in each muffin cup.
Use the plastic spoon to even out the shaving cream in each cup.
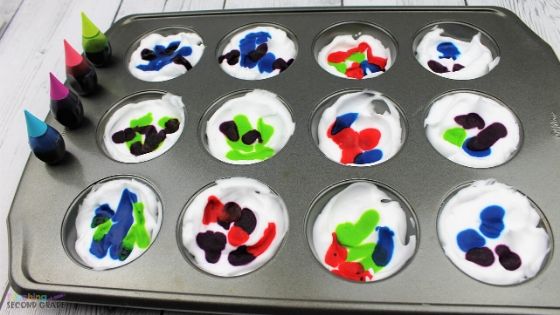
Drop 5-10 drops of food coloring of choice into each cup. You can create different color combinations.
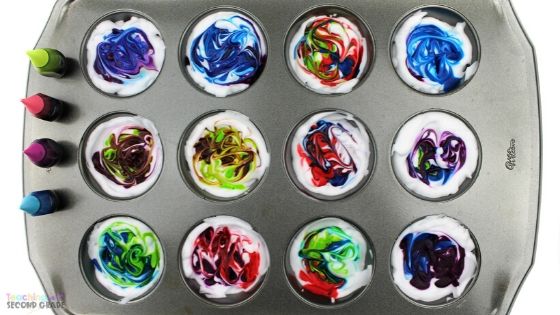
Use a toothpick to swirl the colors around in each cup, creating a tie-dye effect.
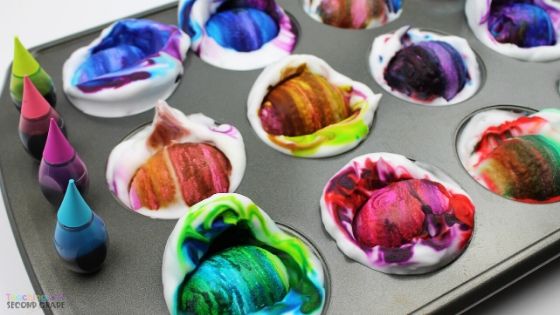
Put on gloves. Carefully place an egg into each muffin cup and rotate the egg into the muffin cup, covering the whole egg.
Repeat this step for all eggs.
Allow eggs to sit for 10-15 minutes.
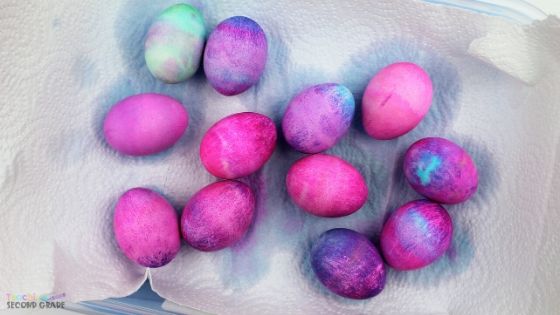
Rinse each egg off under cold water.
Place eggs to dry on the lined pan or container.
Do you have plans to dye easter eggs this year? Dye Easter eggs with shaving cream this year and let me know in the comments how they turn out!